Windows Server 2019 安装 VirtualBox 增强功能

 时间:2026-04-22 09:21:35

1、step 1. 点击虚拟机菜单栏“设备”按钮,然后点击弹出菜单中的“安装增强功能”。

Windows Server 2019 安装 VirtualBox 增强功能

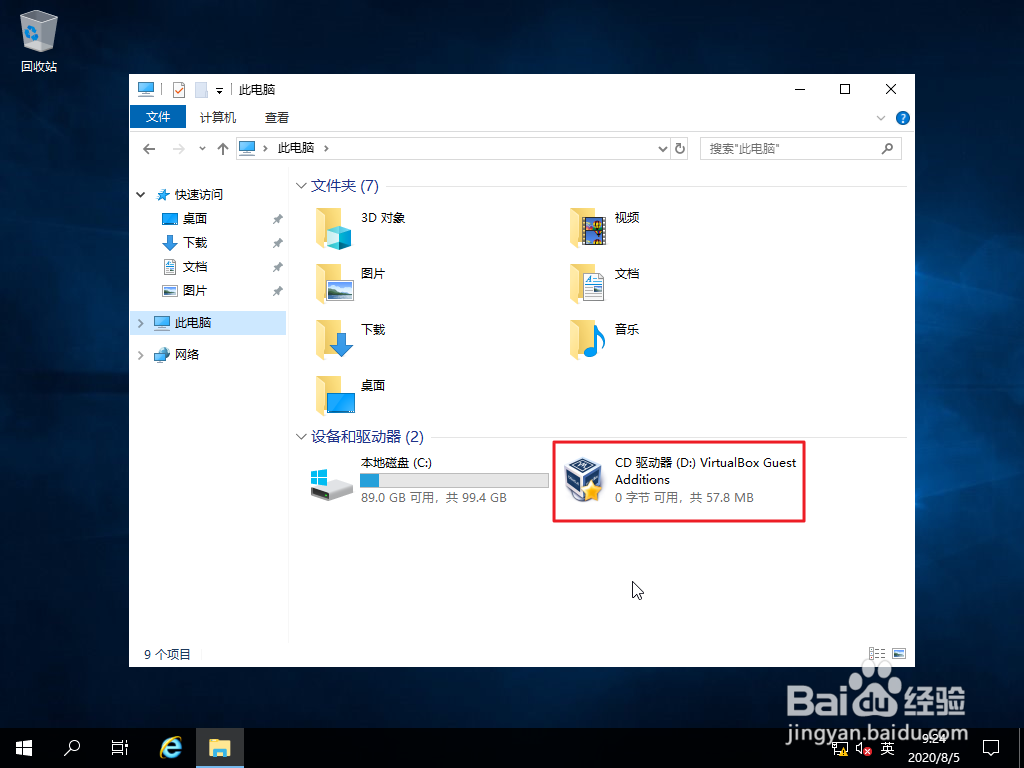
2、step 2. 打开“计算机”,可以看到“VirtualBox Guest Additions”ISO 映像文件已挂载,光驱盘符为D。
Windows Server 2019 安装 VirtualBox 增强功能

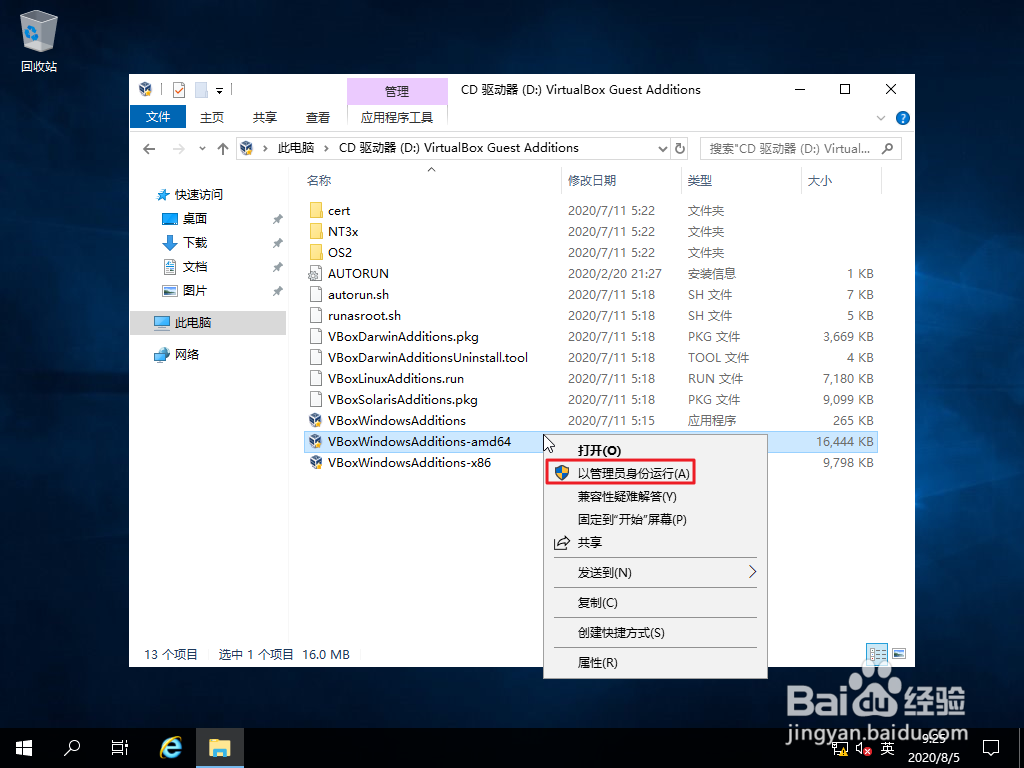
3、step 3. 打开光驱,选中amd64 结尾的文件(x86 适用于32 位系统,amd64 适用于64 位系统),点击鼠标右键,然后点击右键
Windows Server 2019 安装 VirtualBox 增强功能

4、step 4. 安装引导界面,点击“Next”。

Windows Server 2019 安装 VirtualBox 增强功能

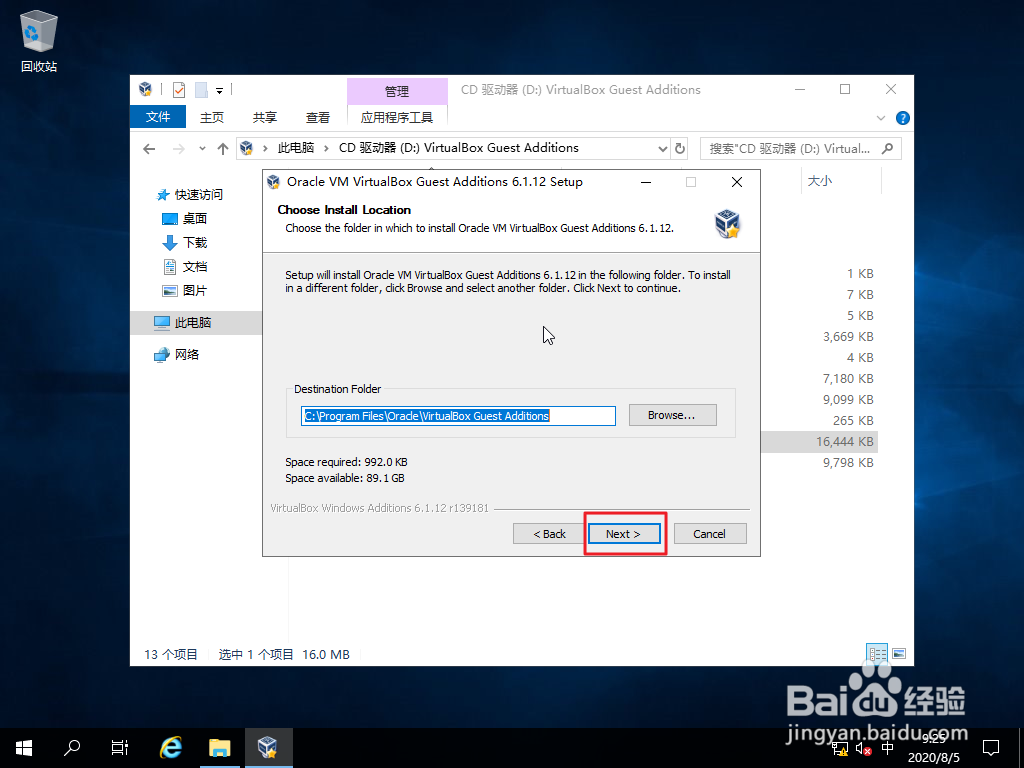
5、step 5. 选择安装位置,默认即可,直接点击“Next”。

Windows Server 2019 安装 VirtualBox 增强功能

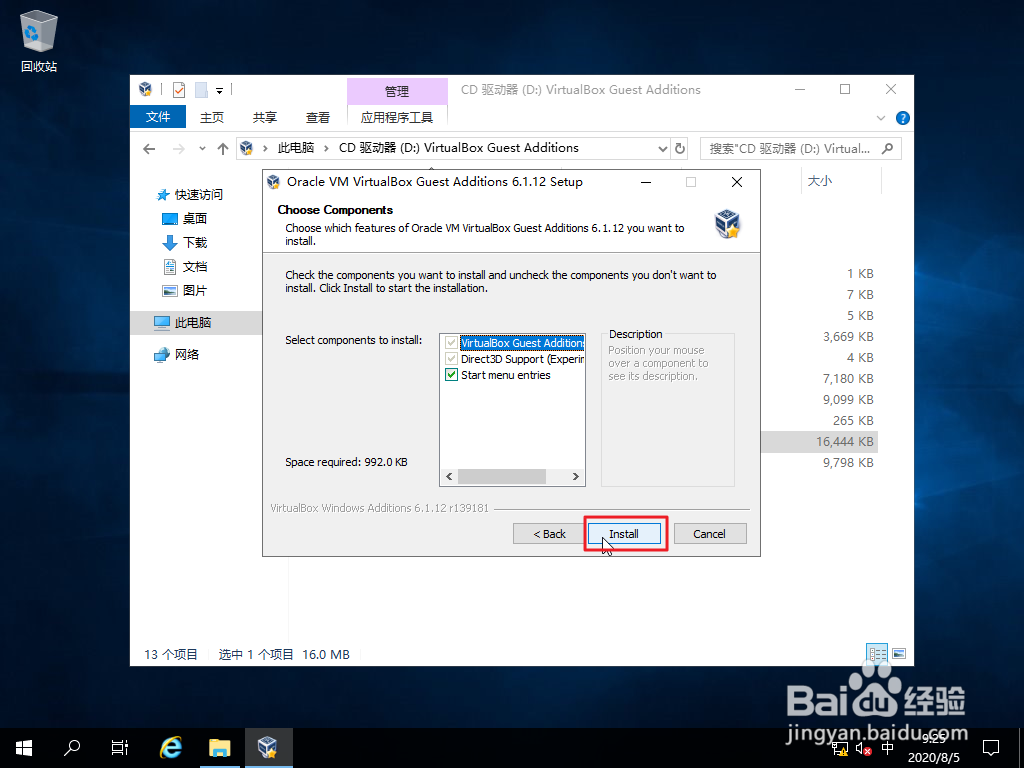
6、step 6. 选择需要安装的组件,默认即可,直接点击“Install”。
Windows Server 2019 安装 VirtualBox 增强功能

7、step 7. 开始安装。

Windows Server 2019 安装 VirtualBox 增强功能

8、step 8. 询问是否安装“Oracle Corporation 系统设备”,勾选“始终信任来自Oracle 的软件”,然后点击“安装”。

Windows Server 2019 安装 VirtualBox 增强功能

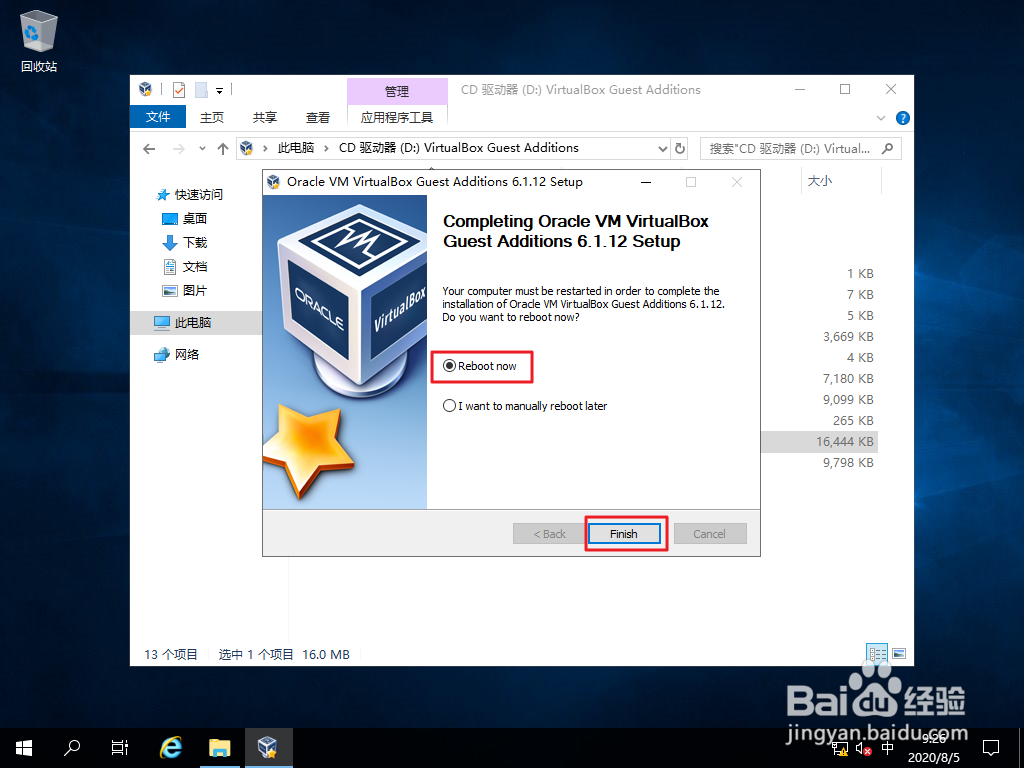
9、step 9. 提示需要重启才能完成安装,勾选“Reboot now”,然后点击“Finish”。
Windows Server 2019 安装 VirtualBox 增强功能

10、step 10. 重启进入桌面后,点击桌面右下角通知栏,可以看到“VirtualBox Guest Additions”已处于运行状态。

Windows Server 2019 安装 VirtualBox 增强功能

  • Mathematica基础——字符串操作初步
  • 如何设置Java窗体的图标
  • VS编程:固定窗口大小禁止用户拖拽改变窗口尺寸
  • Visual Studio2013怎么设置启用HTML设计器
  • C#怎么输出数组中元素内容
  • 热门搜索
    染头发什么颜色好看 什么牌子的电饭煲好 谷胱甘肽的作用 消防安全知识讲座 传染病防治知识 公务员成绩什么时候出来 什么病最可怕 奇怪的运动第二部 雪莲果的作用与功效 有什么好玩的网游